Greetings Photoion students and photography fans. Today we are exploring the art of water drop photography with our guest author Joao Carmo, year 12 student, who’s done 2 week work experience with us. He chose water drop photography as his project during the placement and created some stunning imagery with the guidance of our tutor Ion Paciu. Below he is sharing the results and findings on water drop photography.
Water drop photography is the art of freezing the beautiful architecture of a droplet in time.
For starters, in water drop photography, specific equipment is required. However, there are more expensive and professional ways which will help you achieve better results more easily. But before you go out there and spend lots of money on equipment make sure you have some experience on the DIY (less expensive) methods such as the ones we will refer to on the rest of the article.
To achieve the best results possible, you will need to be aware of the following: containers (which retain the liquid), the actual liquids that you will use, how the lighting affects the scene, the colours, the timing, the focus, and the shape of the droplet (the best way to understand the above is to go experiment yourself after you read this article).
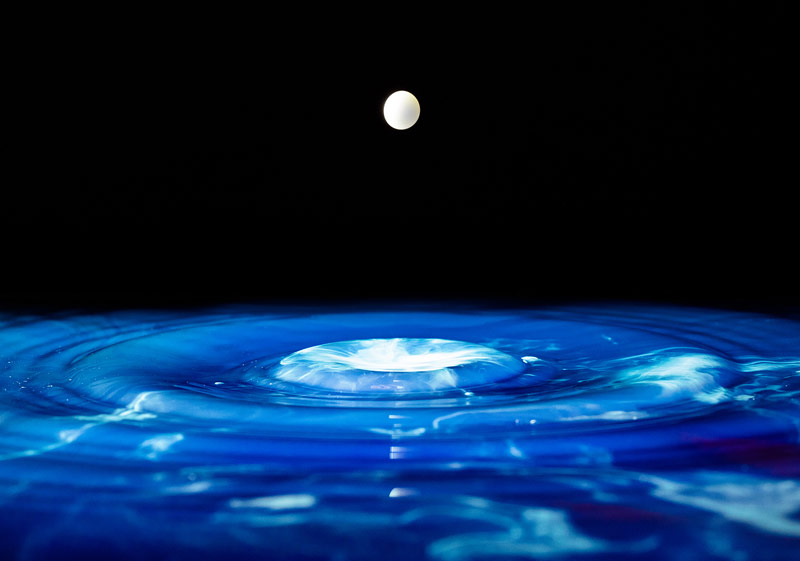
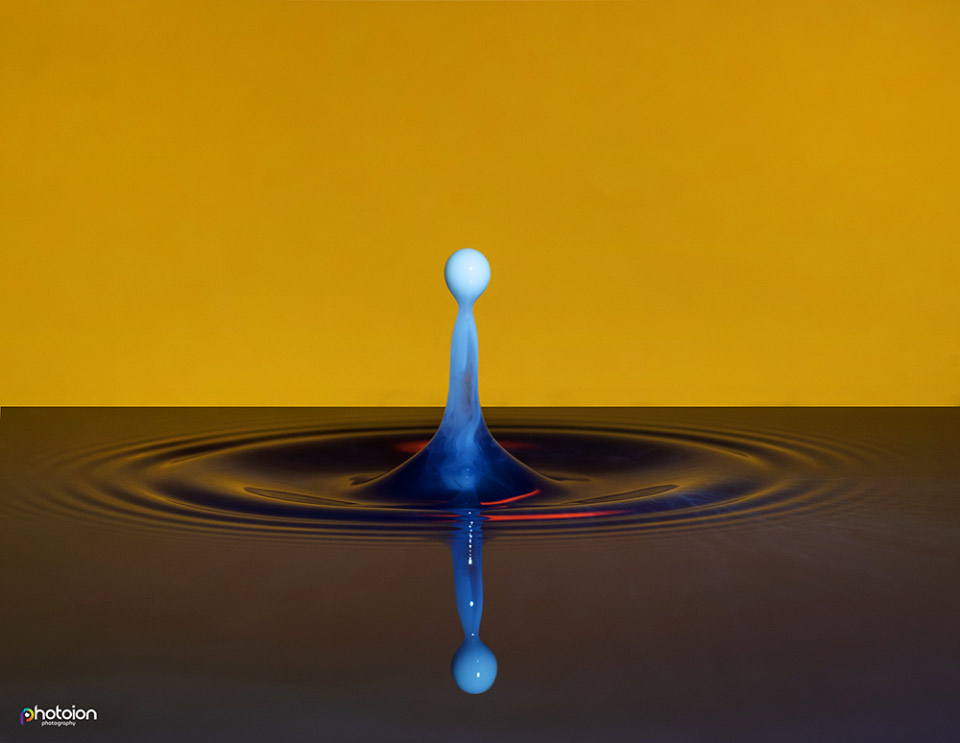
Image taken by Joao Carmo
Firstly, the containers; you will fill them up until the liquid starts to go over the border (creates a look of an endless scenery of reflection). Then the water droplets will be dropped onto the container filled with the desired liquid, to achieve maximum reflection use a black or dark container (for the best reflection possible).
Secondly, the liquid; this is where the possibilities become endless as you are able to combine and mix liquids to create interesting images, liquids such as food dye and acrylic help to make your image more artistic, this is because they are a thicker liquid. If you are a beginner I recommend you start with milk or warm water mixed with sugar (this will help develop the basic understandings of this process), the sugar will make the water a little cloudy as well as thicken it which is better to create a more dramatic look.
Thirdly, the lighting; this is a very important part of the process to achieve the best look possible. I advise you to use an off-camera flash, if possible 2 to 3 flashes, 2 being the most ideal (as you are able to light the background as well as the droplet. As a photographer, you should get creative and experiment with lighting your subject from different angles as this will enable you to create different effects. On the other hand, I found that the best results were obtained when one of the speed lights was bouncing light from the background onto the droplet.
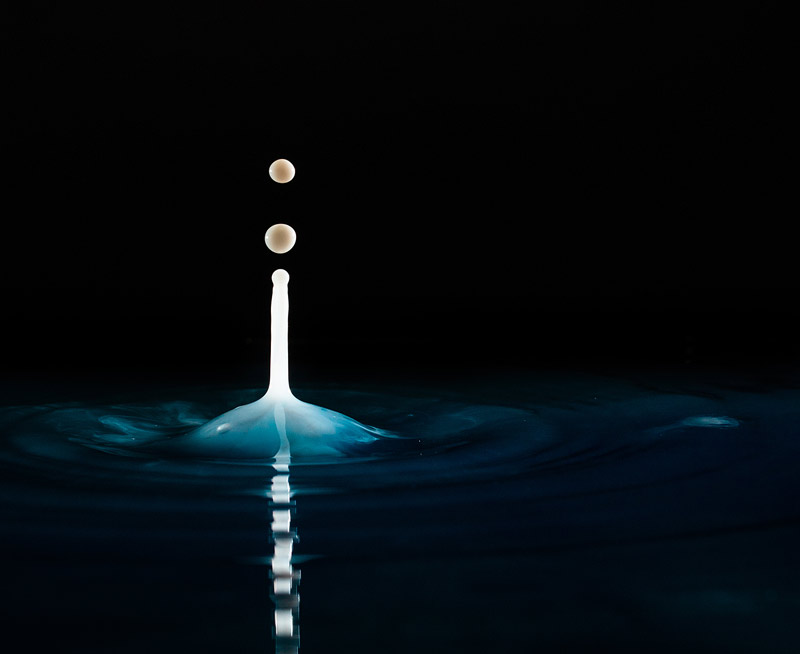
Image taken by Joao Carmo
For our photoshoot, we used two speed lights, one lighting the foreground and another illuminating the back of the drop (it was positioned behind the background paper). However, we also experimented and changed the angle at which the flash was illuminating the water drop (we placed a single flash on one of the sides of the container, this helped us achieve different results).
Furthermore, you will need the room to be only lit this way to achieve the best results, as no outside lights are interfering with the reflections on the droplet. In addition, the most common settings are the ISO 100-200, exposure of 0.05 seconds minimum max 0.14 seconds (the speed lights will enable you to freeze the water droplet, you require a minimum power of 1/16th for the speed lights), the aperture should be between F/11 or F/16 as this will enable you to achieve the sharpest results.
The fourth most important step to achieving the best results is the colour (may also use black and white). This will most certainly have an impact on the mood of the photograph. The colours obtained in the droplets are normally from food colouring/dye. Whereas the colours of the background come from the actual colour of the background or the distortion of the speed lights through the use of transparent coloured plastics also known as gels. Again, to achieve the best results make sure you experiment as much as you can.
Image taken by Joao Carmo
Another point is the timing and focus. This is a very crucial step and should not be underestimated as it will have a very great impact on final look. Because everything is happening very fast, it is hard to obtain the desired results very quickly, so be patient! To set the focusing in the right place you can use an object and place it where the water drop would land then focus on it, and then remove the object (aperture between F11 and F14 is where I was able to achieve the best results. However, you still need to deal with the timing, which comes down to trial and error.
Furthermore, the shape of the water drops. The shape of the water drop will heavily depend on the dripping equipment you are using. The more expensive equipment will enable you to be more consistent with your results (as it comes down to timing and the cheaper method will not create collisions for us, so we have to time it right). However, because not everyone has access to expensive equipment I will provide some tips on how to use cheaper DIY methods to achieve stunning results.
There are 3 main DIY methods: the sponge, the pipette/syringe and finally the plastic bag. With all of these methods collisions between drops will be very hard to create so it is harder to achieve very good results that you may have seen online (I was not able to achieve this). However, these methods will help you understand how this kind of photography works and if it is worth the investment in more expensive equipment.
- The wet sponge method is the least reliable method as it is hard to know when the drops will fall from the sponge on the container with the liquid. Firstly, you place the sponge inside the desired liquid and let it absorb it then place where the droplets can fall onto the container.
- The second method is the pipette/syringe this is the most reliable method as you are able to control when the droplet is released.
- The final and third method is the plastic bag, for this method you require a bag and a needle to make a small hole in the bag, the size of the hole will determine the rate at which the droplets fall, however, if the hole is too big the frequency at which the droplets will fall onto the container will be very high to the point where the reflections are very distorted.
In conclusion, you as a photographer/artist should experiment with the available tools striving to achieve the best results possible. But remember to think outside of the box and break all of these rules so that you are able to create a more personal image.
Extra Tips:
- Make sure you only drop one to two drops at the same time, this will keep the water still and so the reflections will be better.
- Experiment with the lighting (flash power/angle).
- Make sure you get a composition that you are happy with.
- Be patient (may take a long time to get an image you are happy with).
Equipment list
- Minimum 1 Flash.
- A macro lens or a lens that allows very close focusing distance.
- Coloured paper for the background (black background makes the reflections more prominent).
- Containers (better if black-improve the reflections).
- Liquids (warm water mixed with sugar, milk, food dye, acrylic paint, etc).
- A remote trigger to keep the camera still (optional as long as the flash is powerful enough to freeze the water drop).
- Plastic bag, sponge, a pipette (depending on method).
I use a very simple method. Dripping tap, totally dark room, handheld flash, background paper and lots of trial and error.